

LTL Shipping Checklist: 7 Steps to Prepare and Ship Freight
What You Need Before Shipping LTL Freight
When it comes to shipping LTL freight, there are a few things you should know. Securing the shipment to a pallet is very important. Also, make sure you take down the package’s dimensions and weight. Fill out and complete any necessary paperwork. Be sure to attach all of the required shipping labels. Last but certainly not least, prepare the consignee to inspect the freight at delivery. Doing so will ensure you are fully prepared to ship your freight.
LTL Shipping Checklist
Explore this structured outline below, as we will be using it to help you better understand what you need to do to complete your LTL Shipping Checklist by adhering to these easy-to-follow steps below:
- Package and palletize your freight
- Measure and weigh the packaged shipment
- Choose freight protection
- Book the shipment and review the paperwork
- Attach the shipping labels
- Prepare for carrier pickup
- Review delivery procedures with the consignee.
Step 1: Package and Palletize Your Freight

Choose the Right Pallet
Choosing the right pallet, as far as LTL shipping is concerned, is imperative. The main thing to consider when choosing a pallet is that it should be strong enough to support the shipment. Also, a pallet that is compatible with a forklift or a pallet jack is highly recommended. A pallet should be easy to move and transport your freight.
Freight and Pallet Edges
Making sure that freight doesn’t hang over pallet edges is something that is important to consider. Overhanging freight can lead the carrier to refuse to take your freight, as it may pose a safety issue. This is because if your shipment is overhanging, there’s a greater risk of your product getting damaged or of damaging another person’s shipment.
Secure the Freight to the Pallet
There are several ways to secure your freight to a pallet. For example, you can use stretch wrap to secure your shipment. Another way to secure your freight is by strapping it down. Securing your freight with straps ensures it stays in place and won’t move during transport. In addition, crates should be used when additional protection is needed.
Step 2: Measure & Weigh the Packaged Shipment

Measure the Final Packaged Dimensions
Although it is important to measure and weigh a shipment, be sure to measure the final packaged shipment. You want an accurate measurement of the entire freight so that you can ensure the carrier knows how much space your freight will take up.
Understand Density and Freight Class
When it comes to density and freight class, a few factors can affect your rate. The actual weight of the freight is one thing that can affect your rate. In addition, the final dimensions can also affect your rate. Both things should be taken into account when measuring and weighing your packaged shipment.
Reweigh and Reclassification Charges
In order to avoid reweighing and reclassification charges, there are a few things you need to keep in mind. It should be noted that carriers can inspect and verify shipment details. If you have included incorrect information, this can lead to billing adjustments.

Step 3: Choose Freight Protection
Carrier Limited Liability
It should be noted that carrier limited liability is not the same as full-value protection. In other words, your coverage may be limited depending on the freight class and weight.
Additional Freight Protection
As mentioned above, carrier limited liability means you’re still leaving your freight open to a lack of protection. With this in mind, additional freight protection is something to think about.
Document the Freight Before Pickup
One of the best ways to ensure that your freight is protected is to take photos of it. You should take photos before packaging it, take photos of the completed pallet or crate, and photograph the shipping labels.
Step 4: Understand Accessorials
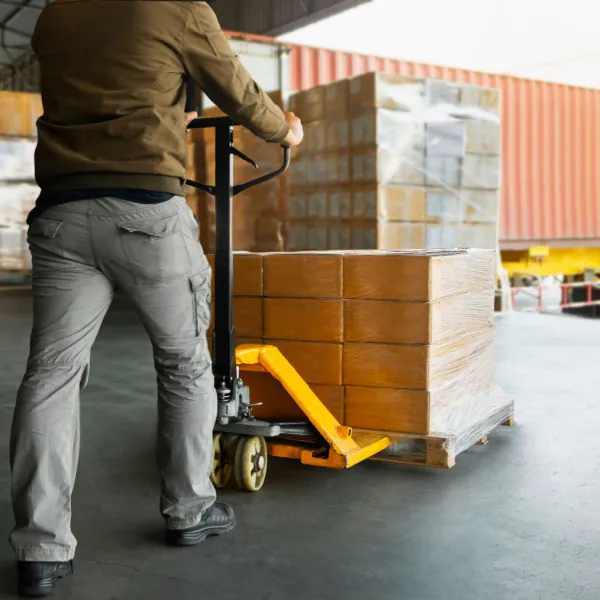
It’s prevalent for shippers to need or require services beyond the basic curbside pickup and delivery, which is an SOP for carriers. Most shippers don’t even know they may need additional assistance, and often, they end up with a surprise billing adjustment after their shipment has been delivered. These other services are called accessorials or add-ons and come in all shapes and sizes. What you may think is a part of the primary or included shipping services could cost you a lot of money.
Ask yourself a few questions, like:
- – Is the delivery or pickup location residential or limited access location?
- – Will the shipment require a liftgate to load or unload from a truck because there is no loading dock or forklift at the pickup/delivery location?
- – Do you or the person receiving the shipment need inside pickup or delivery?
If you answered any of the above questions with “yes” or “maybe,” you will need an accessorial from the beginning of your freight quote process. Other accessorials include white glove services, first mile/final mile services, and special handling services.
We know there are many accessorials, and you may want more detailed information. Download our LTL Shipping Checklist for a complete overview of some of the most common accessorials.
Step 5: Booking your LTL Shipment
Confirm your Shipment Details
It’s important that you consider and review all the details when booking your LTL shipment. First, you want to be sure that the origin and destination ZIP codes are correct. Also, as mentioned previously in this article, make sure the package dimensions are accurate. The total weight of the shipment should be taken into account. Include the exact pallet count; this signals to the carrier the exact amount of freight you will be shipping. When packing your shipment, be sure to have an accurate, detailed description of the freight to avoid any confusion about what is being shipped. Include the freight class when applicable. Keep in mind that having the correct pickup date is important for both you and the carrier. Including delivery requirements is important to help the carrier better understand exactly how to handle your shipment.
Review Your LTL Shipping Documents
When it comes to your LTL shipping documents, it is very important that you take the time to review them all. The first thing that should be reviewed is the Terms and Conditions. Doing so will ensure that you have a thorough understanding of the contract between you and the carrier. In addition to the terms and conditions, be sure to review the Bill of Lading. The Bill of Lading is issued by the carrier and serves as both a receipt for you and proof of ownership of the goods being transported. Last but not least, all of the shipping labels should be visible and reviewed to ensure accuracy.
Step 6: Attach the Shipping Labels
Where to Place Freight Labels
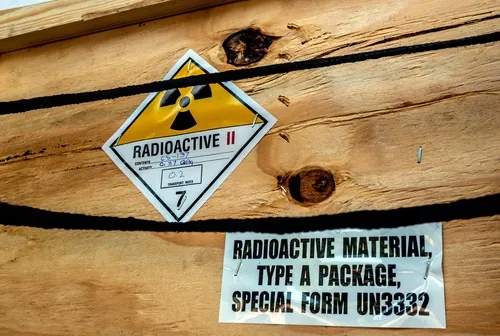
Freight labels should be placed on visible, accessible sides of the pallet, crate, or package. This is to ensure that it is scannable and easy to transport. Attach the two shipping labels provided by FreightCenter to your package: one on the long side and one on the short side. Please make sure they are visible and accessible to read. Add a coating of clear packaging tape over the labels to ensure they do not become loosened from the package. This will also help protect your labels from the elements. Check out our LTL Shipping Checklist for more details.
Protect Labels From Damage
Below is a list of the proper ways to label your shipment to protect the labels from being damaged:
- Flat and readable
- Protected from moisture
- Clear of straps and seams
- Attached securely
- Free from old or conflicting labels
In addition, the information on the labels should match the information on the Bill of Lading.
Step 7: Prepare for Carrier Pickup
Understand the Pickup Window
A standard pickup request is arranged as a time window rather than a guaranteed appointment. If you would like a guaranteed pickup time or expedited pickup, this can sometimes be arranged for an additional cost, but it should also be arranged in advance.
Someone Should be Available at Pickup
A responsible person should be available at the pickup so that they can present the following:
- Give the driver the correct Bill of Lading
- Confirm the pallet or piece count
- Answer basic shipment questions
- Ensure the correct freight is loaded
Make the Freight Accessible
The shipment should be packaged, labeled, and positioned where the carrier can access it safely.
Give the Driver the Correct Bill of Lading
It is important that the driver receives the correct Bill of Lading. Also, as a FreightCenter customer, be sure to use the FreightCenter-provided Bill of Lading so the shipment is connected to your booked rate and account information.
If you are working with FreightCenter, remember: Giving the driver the FreightCenter BOL is essential. If you don’t, the carrier will not process your order with the discounts FreightCenter has secured on your behalf.
Step 8: Review Delivery Steps with the Consignee
Share Shipment Details Before Delivery
Details that should be shared with the consignee include the expected shipment details, for starters. Also, it’s important to share the pallet or piece count. In addition, photos of the packaged freight are important. Including delivery requirements is essential as well. Along with all of the following items to be sent to the consignee, inspection instructions should also be sent. Sharing these shipment details will help ensure the safe transport of your freight.
Inspect the Freight Before Signing
Before signing, the consignee should check for quite a few things to make sure the shipment made it safely to its destination without any damage. First, the consignee should verify that no pieces are missing from the shipment. Having received the bill of lading from the shipper, it should be easy to identify any missing portion of the shipment. Another thing the consignee should look out for is whether there are any crushed boxes. Crushed boxes could indicate that the shipment may be damaged. In addition, torn wrapping may indicate that the shipment has been damaged. Straps are used to secure the freight; if any are broken, this might also indicate that the shipment has been compromised.
When inspecting the freight, damaged pallets could indicate that the shipment may have been damaged or collided with another shipment and that the contents may be broken. The consignee should check for any holes or puncture marks in the shipment. Dents could also indicate that the shipment is damaged. Any water exposure is a clear sign that the shipment has been damaged as a result of having something being spilled on it. As with all of the above-mentioned signs of damage, it’s important to inspect the shipment carefully and thoroughly before signing. Once the consignee signs for a shipment, it must be received regardless of any damages.
Note Damage or Shortages on the Proof of Delivery
Visible damage or missing freight should be described clearly on the delivery receipt before it is signed. Instead of simply using the words damaged, the consignee should provide specific details. For example, they can say things like “two boxes are crushed on the right side” or “one pallet is broken.”
Take Delivery Photos
Photographing the freight before it is unpacked is the best practice. Also, including the damaged area in the photos is important. The signed delivery receipt should be included in the list of photos to take. Including clear photos that show the freight was correctly packaged and free of damage before transport will help your case if a damage claim needs to be filed because the product was damaged during shipment. It should be noted that taking photos does not guarantee you will win your claim but does work in your favor in terms of having hard evidence.
When documenting your freight before pickup, consider that it will be traveling with other freight, making it more prone to damage when stacked on top of or next to other freight. With this in mind, it’s clear how important it is to document the condition of the freight upon receipt.
Booking with FreightCenter
Paying for your shipment is part of the booking process. When booking with FreightCenter, once payment has been received, your shipping agent generates an email for you with all the paperwork you will need, including:
- – Terms and Conditions.
- – Bill of Lading (2 copies).
- – Shipping labels (2 copies).
To make the shipping process even easier for you, partner with FreightCenter to help guide you through the LTL shipping process. With expert agents who can find personalized solutions for your small business shipping and supply chain needs, a strong network of carriers, and robust transportation management software (TMS). We’re everything you need in one place; we’re the go-to 3PL for shippers everywhere.
Start by getting a free quote, or call 800.716.7608 today.
What information do I need to get an LTL freight quote?
Provide the pickup and delivery ZIP codes, packaged dimensions, total weight, pallet count, freight description, and any required services such as liftgate or residential delivery.
Does LTL freight need to be placed on a pallet?
Not always, but palletizing is usually the safest and most efficient option. Fragile, heavy, or irregular items may require a crate or other secure packaging.
How do I measure a pallet for LTL shipping?
Measure the fully packaged shipment at its longest length, widest width, and total height from the floor to its highest point.
How do I weigh an LTL shipment?
Weigh the entire packaged shipment, including the pallet, crate, wrapping, straps, and protective materials. Use a commercial freight scale when possible.
What happens if my freight weight is incorrect?
The carrier may reweigh the shipment and issue a billing adjustment. Incorrect weight can also affect density and freight class.
What is freight class?
Freight class helps determine LTL rates based on density, handling, value, and risk of damage. Classes range from 50 to 500.
What is an accessorial charge?
An accessorial charge is a fee for services beyond standard dock-to-dock delivery, such as liftgate, residential, limited-access, or inside delivery.
When do I need liftgate service?
Liftgate service is needed when the pickup or delivery location does not have a loading dock or forklift.
What is a limited-access location?
A limited-access location has restricted entry or unusual delivery conditions, such as a school, military base, farm, construction site, or storage facility.
Does an LTL pickup time guarantee when the driver will arrive?
No. Standard pickup times are usually requested windows, not guaranteed appointments. Time-specific service may cost extra.
What paperwork does an LTL shipment need?
Most LTL shipments require a Bill of Lading and shipping labels. Hazardous, regulated, or international shipments may need additional documents.
Where should I place shipping labels on a pallet?
Place labels on visible, accessible sides of the pallet or crate. Keep them flat, readable, secure, and away from straps or seams.
What should I do if my freight arrives damaged?
Inspect the freight before signing, note all damage or shortages on the delivery receipt, take photos, and keep the shipping documents.
Who is the consignee in an LTL shipment?
The consignee is the person or business that receives the shipment and is responsible for inspecting and accepting the freight.
How far in advance should I book an LTL shipment?
Book several business days ahead when possible. Early booking gives you more time to compare options, confirm services, and prepare the shipment.